October, 2020
I had a great time doing a long distance collaboration with fellow wood artist Sally Ault to create a "pass it forward" sculpture for a benefit auction. Sally made a nice hollow form that she mailed to me and I transformed it into a kinetic piece. When completed, I mailed it to Frogwood Collaboration 2020 in Portland, OR for an online benefit auction. This collaborative process is really fun, I highly recommend it to all artists. The original hollow form of silk oak. It was so pretty, I almost didn't want to transform it...but I got over that.
 Started by lopping off the bottom...cutting a round form is challenging! The tongue depressors kept the cut from springing shut as I worked my way around.
 The next steps were to get the base established and create the simple mechanism for the wagging tongue...low tech but effective.
 I wanted the piece to rotate as well, so gears it was. This is always the most fiddly part as the gears need to mesh properly with not too much weight pushing down which can cause difficulty in rotation. For this, I usually use a good quality plywood as the movement is minimal which helps avoid binding.
 The cut-off bottom becomes the top, so to speak. And the decor begins. I create a lot of details in my work by using a woodburner.
 More burning really gives some punch.
 Paint, gold leaf and gel pens get applied before final assembly.
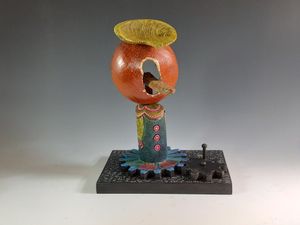
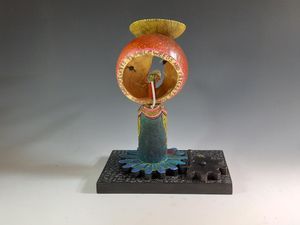
The final result, ready to be shipped to Oregon. Working on this piece was a blast! Please visit my Automata In Action link to see YAK do his thing.
February, 2020
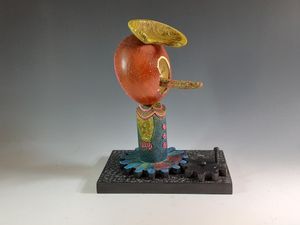
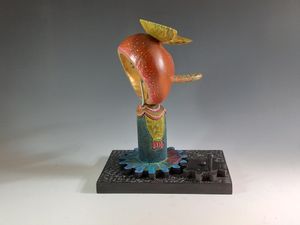
How it gets made...I thought you might be interested in seeing the process for a small automaton I made this week as a challenge for the monthly meeting of my wood turner's club. The challenge was to make a finial box...which indeed was a challenge because I don't turn finials. However, I didn't let that stop me from rising to the dare. May I present "Finial Box": The Process. Finished. The little guys dance when cranked.
 I had this nice cigar box I wanted to use, so I gathered materials...at this point, all I knew was that I needed to incorporate finials & I wanted it to move.
 I consulted my "bible" of mechanisms & created a very "extensive" sketch. I rarely sketch these sculptures completely and certainly don't do any to scale drawings...however, this method only works because I generally use the simplest of mechanisms. Anything more complicated would require better drawings & most likely a scale model, probably of cardboard, skewers & tape.
  Once I decided on the layout, I began positioning the main drive shaft to get as much movement as possible as well as starting to locate the slot for the wire that drives the top finial. Again, I didn't need to be too picky here as building in a little slop adds to the casual nature of this sculpture.
 I didn't get a good shot, but you can see the slot under the top finial which guides the action. You can also see here the shape of the main drive shaft in order to get a rise & fall action, with the hand crank on the right. The bead is used as a stop on the left side, effectively trapping & stabilizing the drive shaft. This photo also shows the spool feet attached, and the painting inside and on the finials.
And that's it!
To see Finial Box in action, click on the page links (Vimeo, YouTube, Instagram or Facebook) above or click the page header "Automata in action", you will be linked to Vimeo directly. Thanks for looking.
December, 2019
And so another begins. Thought you might be interested in the progression of another small automaton I have been tasked to do for a gallery show. There is a limitation in that I must use a supplied 8"x 8" MDF substrate as a base & it must hang vertically on a wall. A fun challenge. I'll post more as more is completed.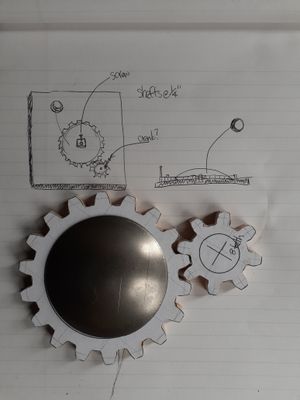
December, 2019
I was kind of stuck, but the afternoon winter sunlight provides just the inspiration I need to finish this WIP sculpture I started this summer at Frogwood Collaboration in Colewood, OR. Hint: There may be lighting involved, stay tuned!
 Tee For One, 18"x 15"x 12"
November, 2019
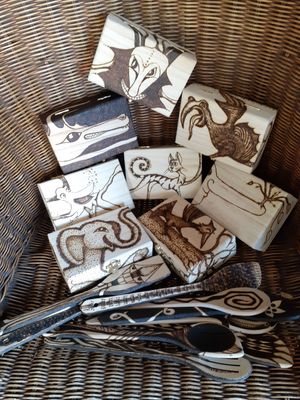
The ongoing pyrography-fest is proving to be serious fun. Making these boxes, bowls & utensils is great practice for more fully realized sculptural endeavors.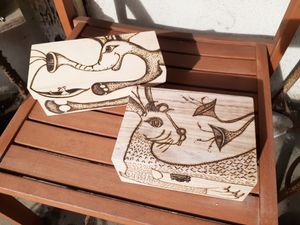

September, 2019
I started making some Beads of Courage boxes (http://beadsofcourage.org/) to support this wonderful organization. I'm cheating a little, since I'm using pre-made wooden boxes, but I'll make up for it with the decoration.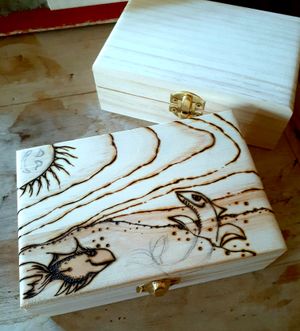
July, 2019
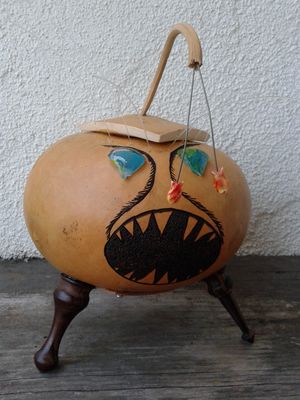
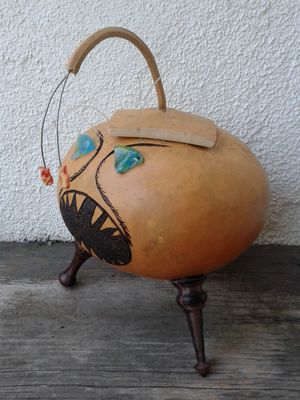
WIP: 2nd in the series Baby's First Nightlight: Fishy, Fishy
I got inspired so I'm making another one. Fishy will get a bit more decor and electrification so its eyes will glow & fiber optic hairs will twinkle.
About 10"x 10".
gourd, wood, glass, wire, fiber optic cable
July, 2019
Thought you might be interested in the "steps to a sculpture"...in this case, I was challenged to make something that lit up. Definitely out of my usual comfort zone, but I did get to learn about LED lighting as the head is totally enclosed so it needed to stay cool. This series of photos shows my process from raw materials to finished piece.
Baby's First Nightlight: Sweet Dreams
finished dimensions: 24"x 20"x 10"
oak log section, gourd, shoe lasts, glass, fiber optic cable, embossed leather, brass tacks, paint, lighting fixtures.
 Sketch cogitation
 The raw materials
 Fitting the feet
 The leather collar keeps the head in place but allows removal in case the lighting needs attention...and you can't see it in this pic, but the leather is embossed with skulls.
 When it all comes together.
 Lit up!
March, 2019
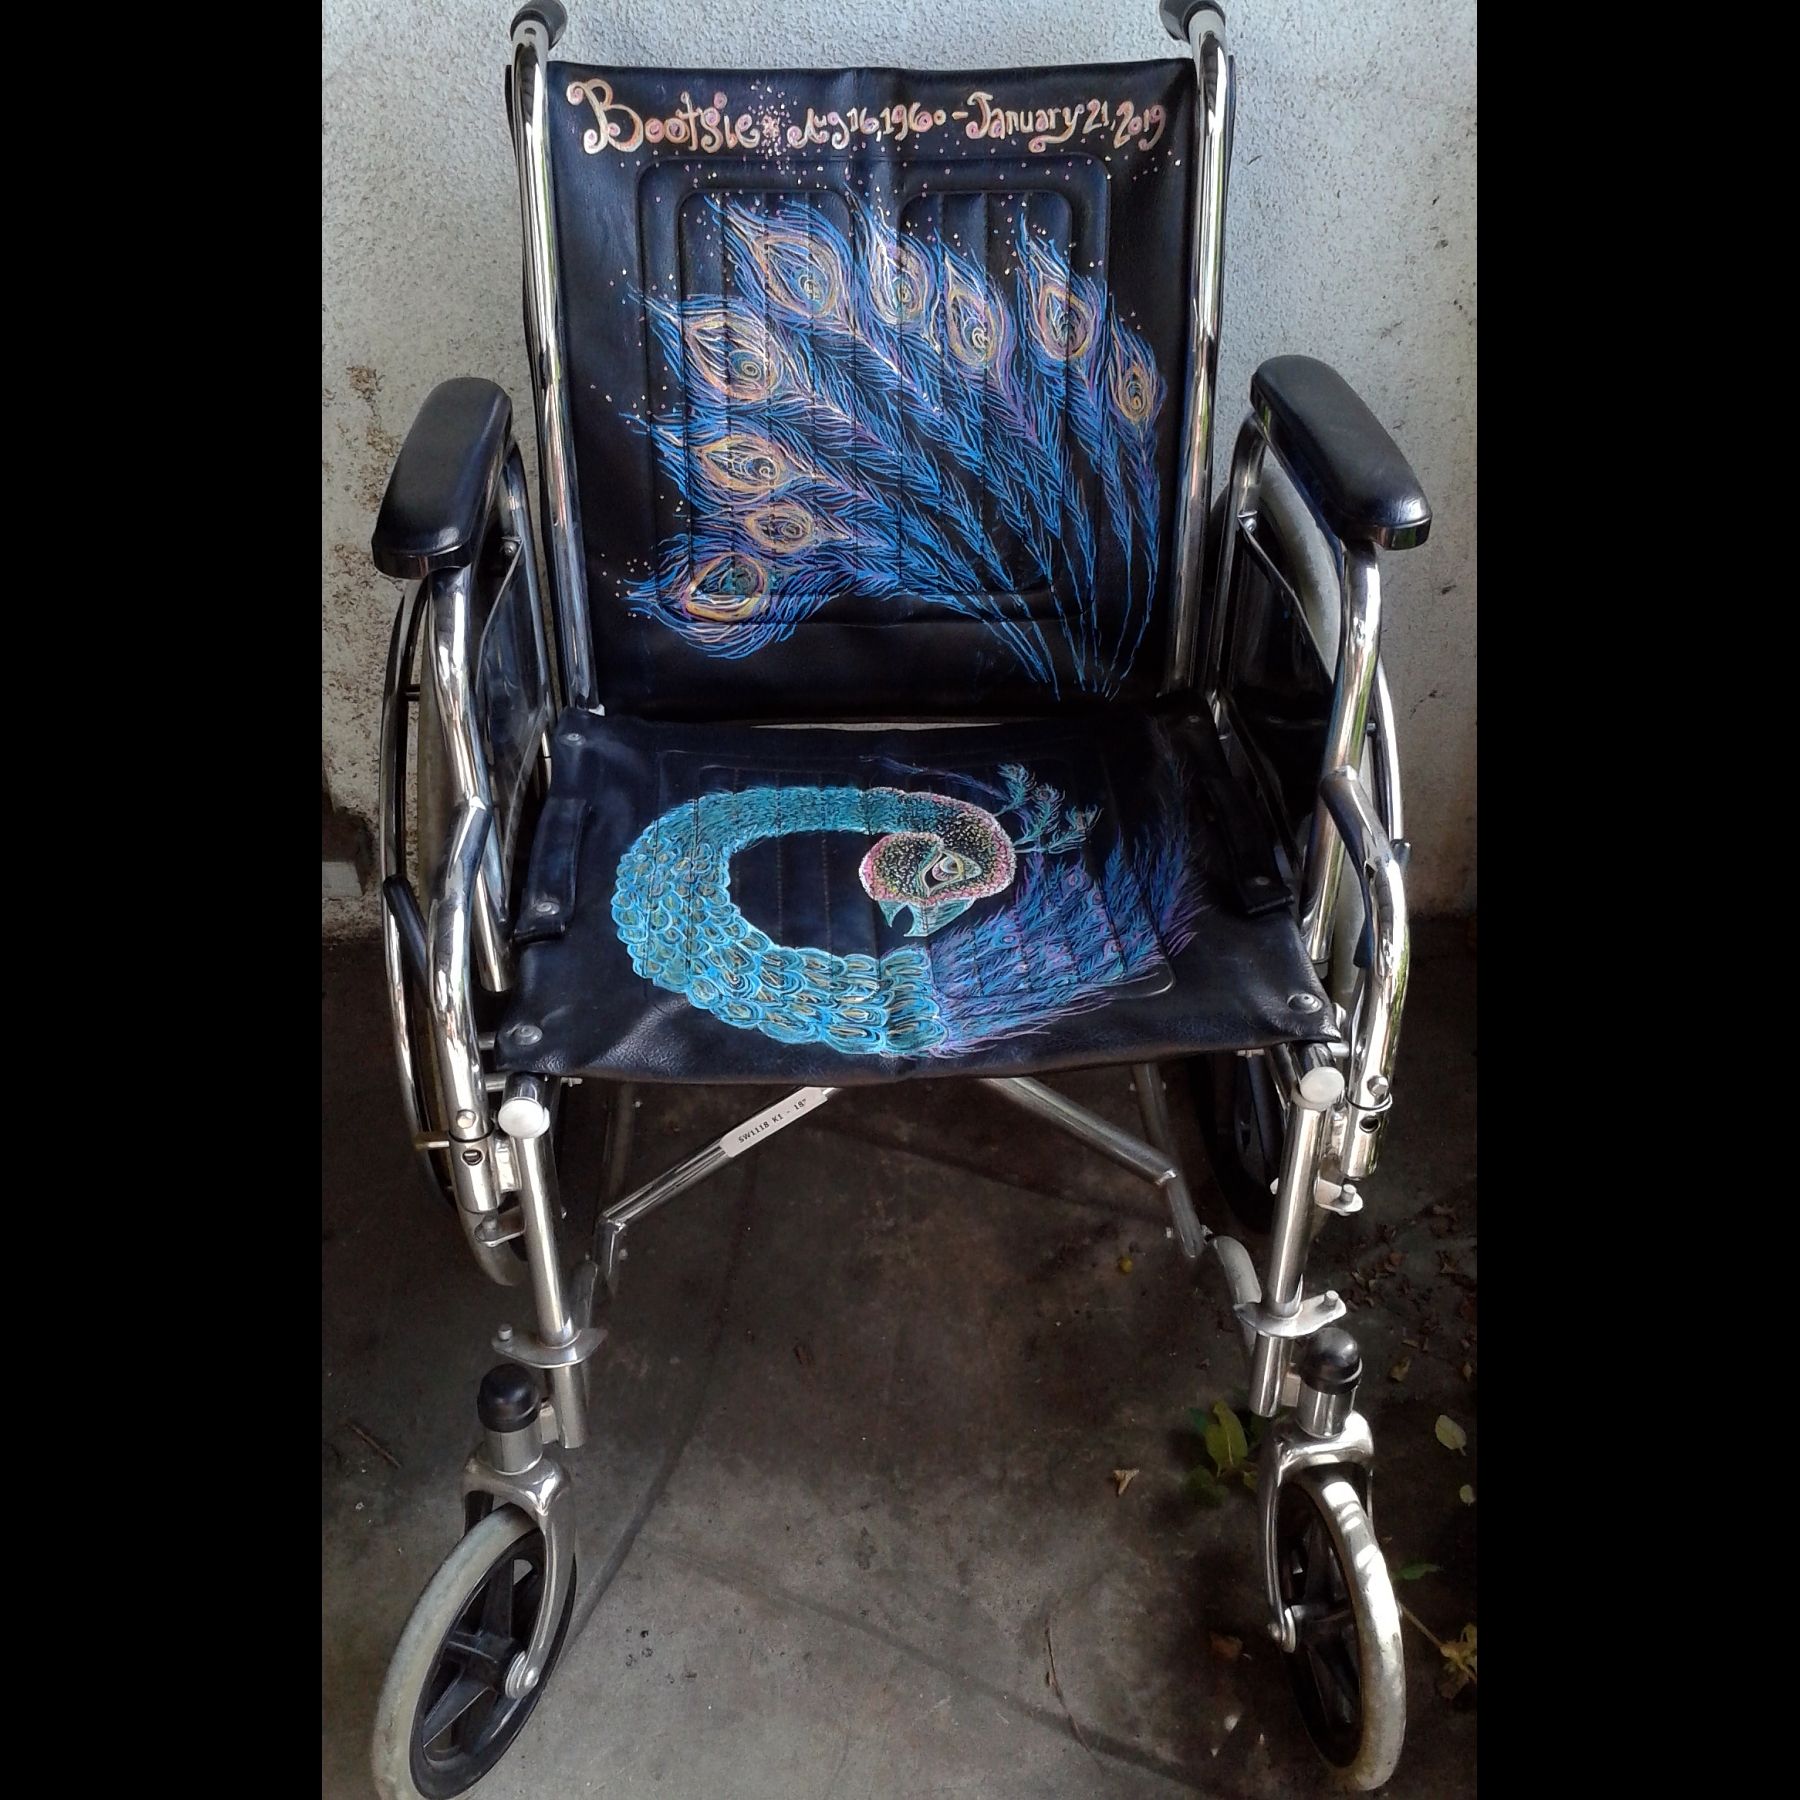
An altar I designed & made for a friend's memorial. It was my first foray into using paint markers, and since I'm not a painter it was a little nerve-wracking. But the markers ended up being easy to use & the perfect medium to stick to the vinyl back & seat of the wheelchair.